HTTPS for ProxMenux Monitor
Turn HTTPS on for the Monitor (port 8008) using either the Proxmox host certificate the Monitor auto-detects, or a custom certificate located anywhere on disk. The Proxmox option transparently picks the ACME-uploaded certificate when present, so a Let's Encrypt cert managed by the Proxmox UI is reused without an extra renewal job.
What this page covers
Where the setting lives
Open the Monitor and go to Settings → Security → HTTPS / SSL. The panel shows the current state (HTTP or HTTPS), and on a host without HTTPS yet it lists the certificate sources the Monitor was able to detect.
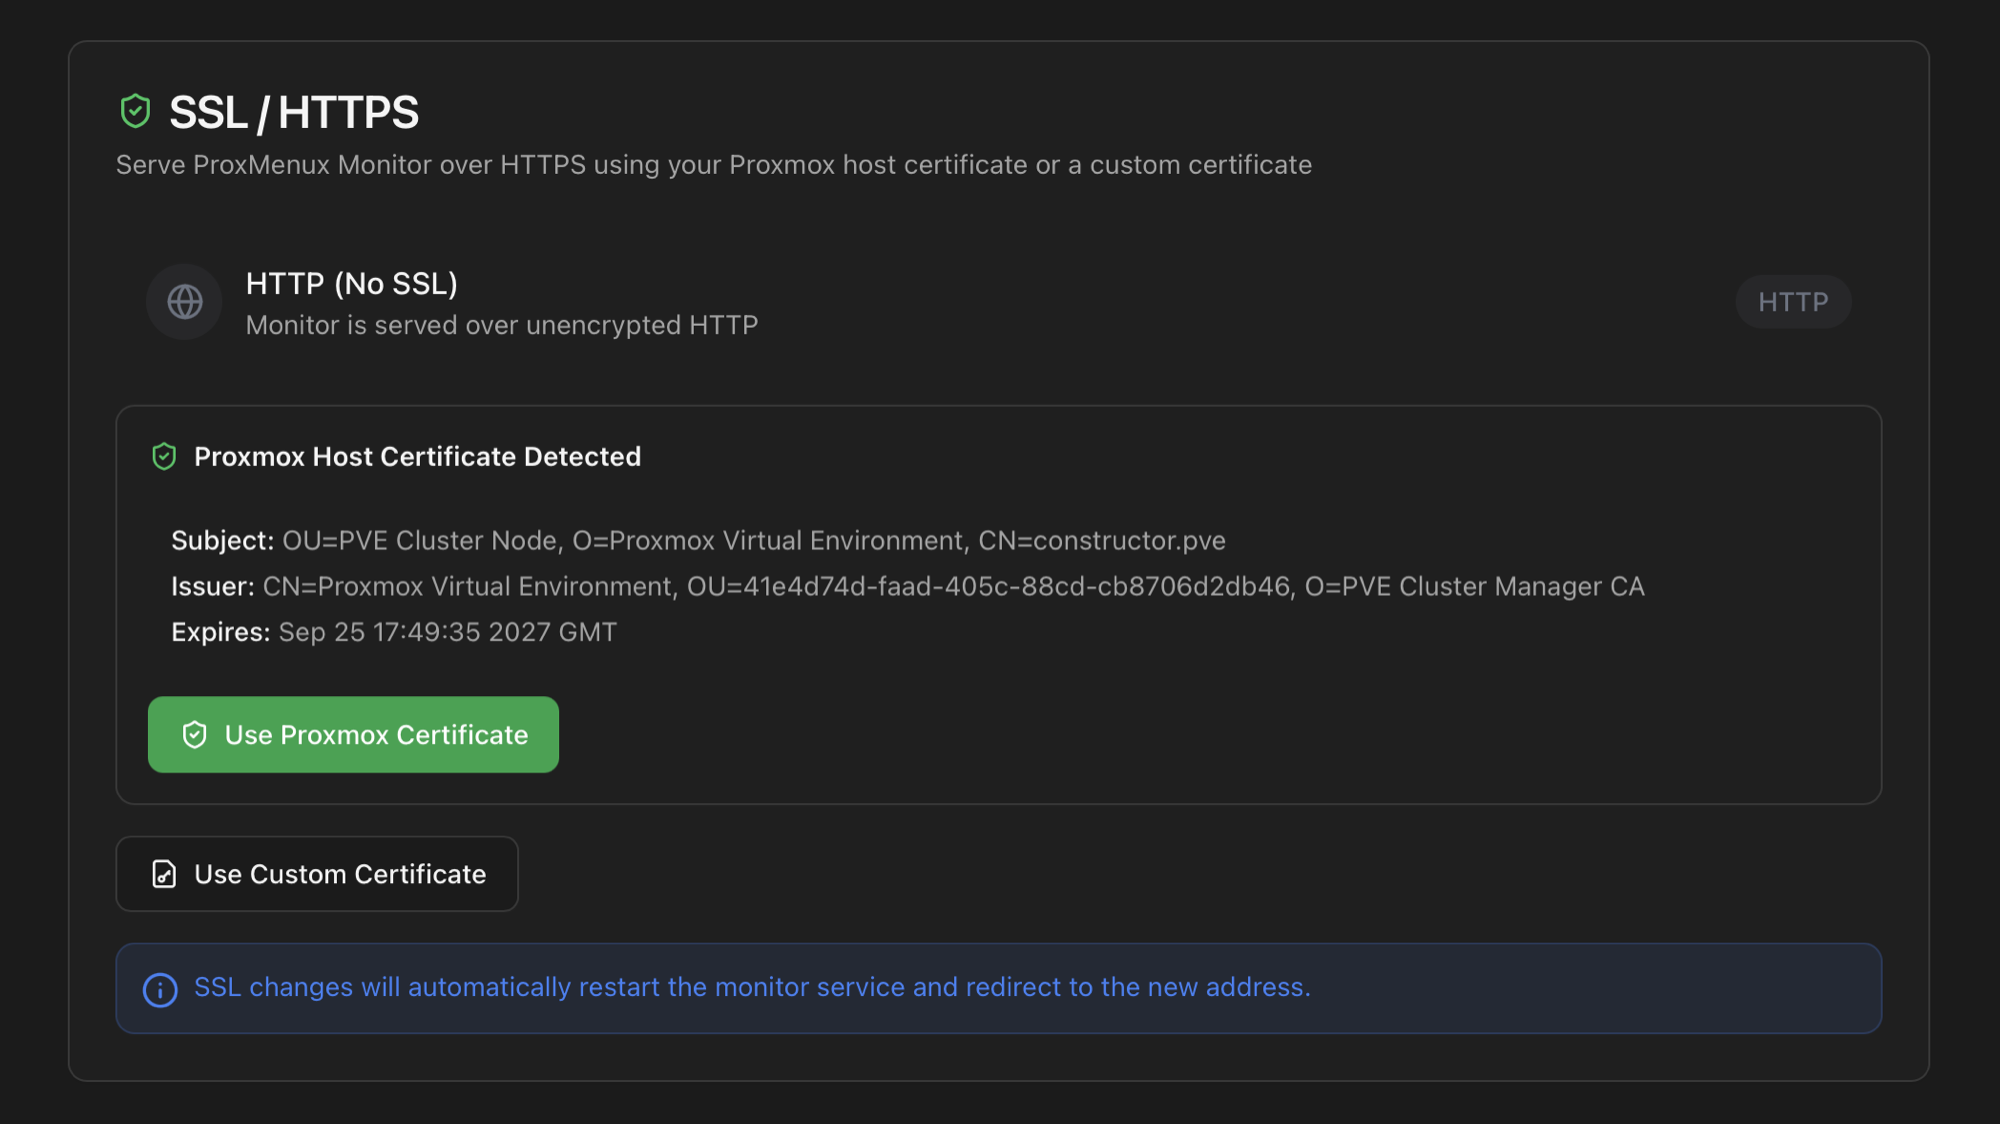
Two ways to enable HTTPS
Use Proxmox certificate
One click. The Monitor reuses the certificate Proxmox VE itself serves on port 8006.
- Auto-detected — no path to type
- Picks the ACME-uploaded cert if present, falls back to the self-signed default
- Renewal happens through Proxmox; the Monitor follows automatically on next start
Use custom certificate
Point the Monitor at a .pem / .key pair anywhere on disk.
- Absolute paths only (the Monitor process must be able to read both)
- Useful when certs come from
certbot,acme.shor a wildcard - You own the renewal — restart the Monitor service after the file changes
Proxmox certificate — what it actually points at
Proxmox VE keeps two certificate pairs in /etc/pve/local/:
| File | Origin | When the Monitor uses it |
|---|---|---|
pveproxy-ssl.pem<br/>pveproxy-ssl.key | Custom certificate uploaded via the Proxmox UI — including the Let's Encrypt certificate issued under Datacenter → Node → Certificates → ACME. | Preferred whenever both files exist. The Monitor will follow the cert Proxmox itself is serving. |
pve-ssl.pem<br/>pve-ssl.key | Self-signed certificate generated at install time by the Proxmox PKI. | Fallback when no pveproxy-ssl.pem is present. |
Same priority as Proxmox itself
pveproxy uses the same selection rule, so picking the Proxmox option in the Monitor always serves the cert the Proxmox web UI is already serving on port 8006. No copying, no separate renewal pipeline.Getting a Let's Encrypt certificate via Proxmox ACME
Proxmox VE ships its own ACME client. Clicking "Order Certificate Now" writes the result to /etc/pve/local/pveproxy-ssl.pem, which is exactly what the Monitor reads. The five-step recipe below is the same procedure as the official Proxmox guide — distilled to the commands you actually need to run.
Prerequisites
- The node has a real DNS name (not just an IP) pointing at it.
- Either port 80 reachable from the public internet (HTTP-01 challenge, simplest), or a DNS provider with API credentials (DNS-01 challenge — works behind NAT, supports wildcards).
- An email address for the ACME account.
Step 1 — Register the ACME account
Replace the email with yours. The account name default is just a label — you can use any string.
pvenode acme account register default you@example.com
Proxmox prompts you to accept the Let's Encrypt terms of service. After that the account is persisted under /etc/pve/priv/acme/ and the ACME tab in the GUI will show it.
Step 2 — Pick a challenge type
HTTP-01 is the easiest: it's built in, no extra plugin. Let's Encrypt connects to http://<your-host>/.well-known/acme-challenge/... on port 80, so port 80 must be open from the public internet to your node — typically a port forward on your router.
DNS-01 works without exposing port 80 (good for homelabs behind CG-NAT) and is the only option for wildcard certificates. You add a DNS plugin once with your provider's API token. Cloudflare example:
pvenode acme plugin add dns cf \
  --api cloudflare \
  --data CF_Token=YOUR_CLOUDFLARE_API_TOKEN
For other providers (Gandi, OVH, AWS Route 53, etc.) check pvenode acme plugin add dns --help — Proxmox ships all acme.sh DNS plugins.
Step 3 — Bind the domain to your node
For HTTP-01 (uses the built-in standalone plugin):
pvenode config set --acme domains=host.example.com,account=default
For DNS-01 with the Cloudflare plugin from Step 2:
pvenode config set --acmedomain0 domain=host.example.com,plugin=cf
pvenode config set --acme account=default
Wildcard? Add domain=*.example.com on a separate --acmedomainN entry. Wildcards require DNS-01.
Step 4 — Order the certificate
pvenode acme cert order
First run typically takes 30–60 seconds while the challenge propagates. On success Proxmox writes /etc/pve/local/pveproxy-ssl.pem + .key, restarts pveproxy, and a renewal cron is scheduled automatically (Let's Encrypt certs are valid 90 days; Proxmox renews at 60).
Step 5 — Verify the issuer
openssl x509 -in /etc/pve/local/pveproxy-ssl.pem -noout -issuer
Should print an issuer starting with O = Let's Encrypt. If it instead reads CN = Proxmox Virtual Environment the order failed and the file is still the self-signed PVE cert — re-run pvenode acme cert order --debug 1 to see why.
Prefer the GUI? Same five steps
Switch the Monitor to HTTPS
Once /etc/pve/local/pveproxy-ssl.pem is signed by Let's Encrypt, the Monitor side is one click: open Settings → Security → HTTPS / SSL, confirm the issuer shown in the detected-certificate panel reads Let's Encrypt (and not the local Proxmox CA), and click Use Proxmox Certificate. The Monitor service restarts and the next browser load is HTTPS on port 8008 — no certificate warning, since the chain is publicly trusted.
Custom certificate — when to use it
Click Use Custom Certificate to enter two absolute paths:
- Certificate — full chain in PEM (
.pemor.crt). - Private key — matching key in PEM (
.key).
Both files are read by the Monitor process at startup. Make sure they remain readable by the user the systemd unit runs as (root by default). Common locations when ACME is managed outside Proxmox:
# certbot
/etc/letsencrypt/live/<your-host>/fullchain.pem
/etc/letsencrypt/live/<your-host>/privkey.pem

# acme.sh
~/.acme.sh/<your-host>_ecc/fullchain.cer
~/.acme.sh/<your-host>_ecc/<your-host>.key
Symlink targets vs. files
certbot stores the actual files in /etc/letsencrypt/archive/ and the live/ path is a symlink. Point the Monitor at the live/ symlink, not the archive/ file — that way each renewal cycle simply rewrites the symlink target and the Monitor picks up the new cert at the next service start.After enabling HTTPS
Saving the change writes /etc/proxmenux/ssl_config.json and triggers a restart of the proxmenux-monitor systemd unit. The browser tab will lose its current connection — reload it on https://<host>:8008/. The first load with a Let's Encrypt cert should show no warning; with the Proxmox self-signed cert the browser will require an exception, the same one as for port 8006.
Reverse proxies and webhooks
When the Monitor switches to HTTPS, Proxmox VE webhook URLs registered for notifications also flip from http:// to https:// automatically. Existing webhook entries are rewritten the next time a notification rule is saved or re-detected, so no manual edit of the Proxmox notification config is needed.
Trust the Proxmox self-signed CA
If you prefer to keep the default Proxmox-generated certificate (no ACME), you can stop the browser warning by importing the cluster's root CA into the OS or browser trust store. The Monitor will keep auto-detecting the same /etc/pve/local/pveproxy-ssl.pem; the only thing that changes is that the device viewing the dashboard now recognises the issuer.
The CA file lives at /etc/pve/pve-root-ca.pem on every node. In a cluster the path is on the shared pmxcfs filesystem so all nodes share the same root, and a single import covers the whole datacenter. Copy it to your machine:
scp root@<your-host>:/etc/pve/pve-root-ca.pem ./pve-root-ca.pem
Then import it on the client side:
- Linux (system-wide):
sudo cp pve-root-ca.pem /usr/local/share/ca-certificates/pve-root-ca.crtfollowed bysudo update-ca-certificates. Browsers using the system store (Chromium, Edge) pick it up after restart; Firefox uses its own store and needs the manual import below. - macOS: double-click the
.pemfile, Keychain Access opens → add it to the System keychain → set Trust → Always Trust. - Windows: right-click the file → Install Certificate → place it in Trusted Root Certification Authorities.
- Firefox (any OS): Settings → Privacy & Security → Certificates → View Certificates → Authorities → Import, tick Trust this CA to identify websites.
Standalone nodes outside a cluster
pve-root-ca.pem. If you manage several standalone hosts, repeat the copy/import for each, or join them to a cluster so they share a single root.Disabling HTTPS
Click Disable HTTPS in the same panel. The Monitor service restarts back on plain HTTP — useful if a custom certificate file becomes unreadable and the service won't come back up. There is no separate uninstall step; the cert files themselves are not touched.
Where the state lives
/etc/proxmenux/ssl_config.json stores the active cert paths and the source (none, proxmox, custom). Deleting the file is equivalent to disabling HTTPS — on next start the Monitor falls back to HTTP.