Create VM: System Linux
Create a Linux VM on Proxmox VE. ProxMenux ships with a curated catalogue of official Linux ISOs ready to download, plus a local-ISO picker, and routes everything through the shared VM wizard, the unified storage plan and the optional GPU passthrough assistant.
What this script does
Default vs Advanced configuration
After the ISO is selected, ProxMenux asks whether to use the default VM profile or open the advanced wizard.
Default configuration
| Parameter | Default value |
|---|---|
| Machine type | q35 |
| BIOS | OVMF (UEFI) |
| CPU type | Host |
| Cores | 2 |
| RAM | 4096 MB |
| Bridge | vmbr0 |
| MAC address | Auto-generated |
| Start on completion | No |
Advanced configuration
The advanced wizard exposes every parameter individually:
| Parameter | Options |
|---|---|
| Machine type | q35 or i440fx |
| BIOS | OVMF (UEFI) or SeaBIOS (Legacy) |
| CPU type | Host or KVM64 |
| Cores | Number of CPU cores |
| RAM | Memory allocated to the VM |
| Bridge | Network bridge |
| MAC address | Custom MAC |
| VLAN | VLAN tag (optional) |
| MTU | MTU size |
Storage plan
After CPU / RAM, ProxMenux opens the Storage Plan menu, where you can combine virtual disks, imported disks and PCI passthrough devices in the same VM, adding items one at a time and finishing when you are done.
a. Add virtual disk
- Lists the Proxmox storage volumes available on the host.
- You pick the target storage and the size in GB.
- The disk is attached to the VM as SATA (
sata0,sata1, … up to 6).
b. Add import disk
- Detects physical disks that are safe to import (system and protected disks are hidden).
- You select one or more disks via a checklist.
- Imported disks are attached as SATA via
qm set.
c. Add Controller or NVMe (PCI passthrough)
- Detects SATA/SAS HBAs and NVMe devices on the host and lets you pass an entire controller into the VM. IOMMU must be enabled; the script offers to enable it and reboots if required.
- A confirmation step warns about controller-wide risk (the whole card, including every disk on it, leaves the host).
- The selected PCI devices are attached via
qm set hostpciN: ….
Reset and finish
Optional GPU passthrough
After the storage plan, if a compatible GPU is detected on the host ProxMenux offers to launch the GPU passthrough assistant. See Add GPU to a VM (Passthrough) for how the assistant works — a host reboot may be required.
Automatic VM features
EFI disk
When OVMF (UEFI) is selected, ProxMenux creates a 4 MB EFI system disk on the storage you pick so the firmware has a place to store its variables.
ISO mounting
The installation ISO is attached to ide2 as a CD-ROM, ready for first boot.
QEMU Guest Agent
The guest agent channel is enabled in the VM config. You still need to install the agent inside the guest — see the tips below.
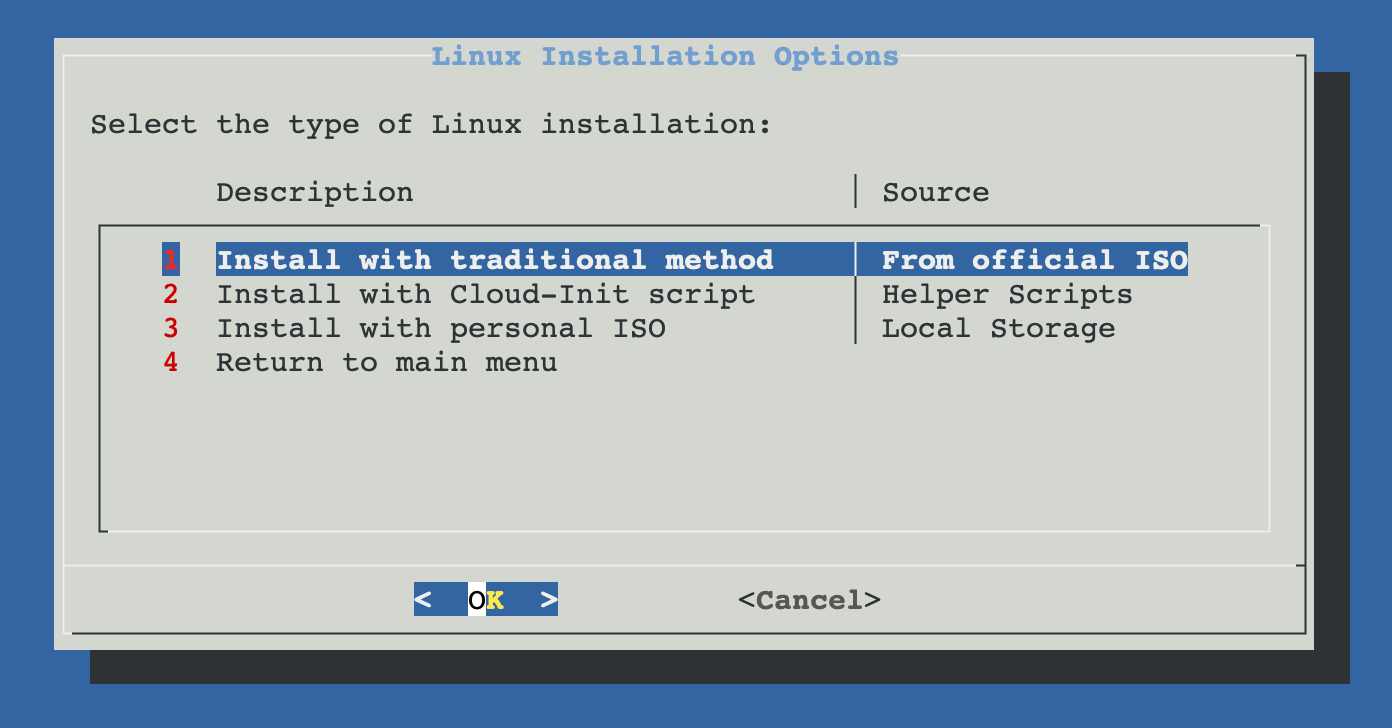
Linux installation options
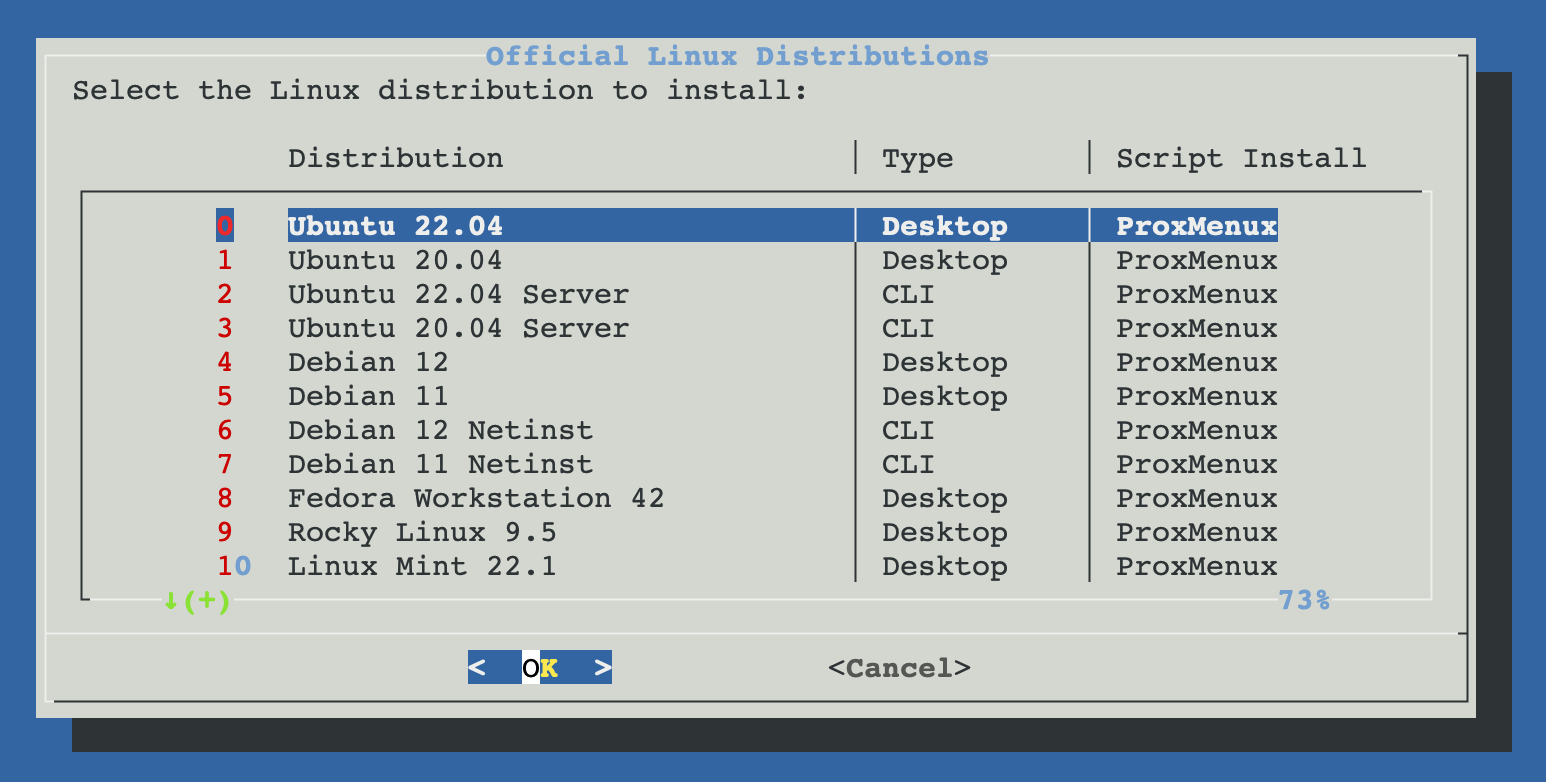
Official ISO (traditional install)
ProxMenux ships with a curated list of official Linux ISOs. Pick one and the script downloads it straight from the upstream mirror into /var/lib/vz/template/iso, then attaches it to the VM.
- 25.10 Desktop
- 24.04 Desktop
- 22.04 Desktop
- 20.04 Desktop
- 25.10 Server
- 24.04 Server
- 22.04 Server
- 20.04 Server
- 13 Desktop
- 12 Desktop
- 11 Desktop
- 13 Netinst
- 12 Netinst
- 11 Netinst
- Workstation 42
- latest
- 9
- 22.1 Cinnamon
- Leap 15.6
- 3.21
- 2026.1
- 25.0 GNOME
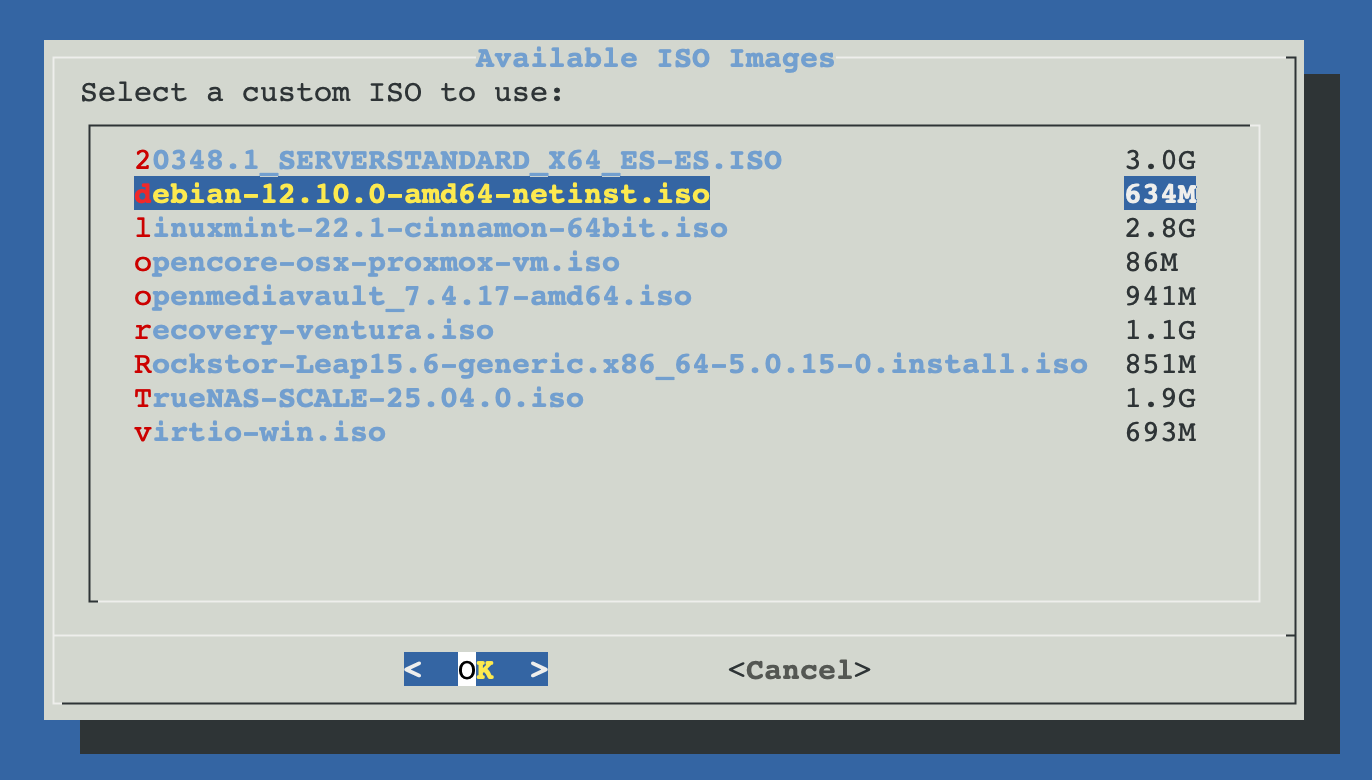
Local ISO
Uses any Linux ISO already present in /var/lib/vz/template/iso. The script lists every *.iso it finds and lets you pick one.
What the script does end-to-end
- Obtains the Linux ISO (official download or local file).
- Applies the default or advanced CPU / RAM / BIOS / machine-type configuration.
- Opens the storage plan and attaches the selected virtual disks, imported disks and PCI devices.
- Creates the EFI disk when UEFI is selected.
- Mounts the Linux ISO on
ide2. - Sets the boot order (disk first, then ISO).
- Enables the QEMU Guest Agent channel.
- Optionally runs the GPU passthrough assistant.
- Generates a styled HTML description attached to the VM.
- Starts the VM if you chose to.
Post-install tips
Install the QEMU Guest Agent inside the VM
ProxMenux enables the guest agent channel in the VM config, but the agent itself has to be installed inside the guest. It enables graceful shutdown, filesystem freeze for consistent snapshots and accurate memory reporting in the Proxmox UI.
Debian / Ubuntu
sudo apt update && sudo apt install qemu-guest-agent -y
sudo systemctl enable --now qemu-guest-agent
Fedora / Rocky / RHEL
sudo dnf install qemu-guest-agent -y
sudo systemctl enable --now qemu-guest-agent
Arch Linux
sudo pacman -S qemu-guest-agent
sudo systemctl enable --now qemu-guest-agent
openSUSE
sudo zypper install qemu-guest-agent
sudo systemctl enable --now qemu-guest-agent
VirtIO support in Linux
Modern Linux kernels (2.6.25+) include VirtIO disk and network drivers out of the box, so you can switch the disk interface to virtio or virtio-scsi in the Advanced wizard and the network adapter to virtio without any extra driver step.
Very old distributions
Enable TRIM / discard on SSD-backed storage
When the VM sits on SSD-backed Proxmox storage and the disk was attached with the discard flag, you can forward trim commands from inside the guest. Two options:
- Run
fstrim -avperiodically (or enable thefstrim.timerunit on systemd distributions). - Or mount filesystems with the
discardoption in/etc/fstab.
Memory ballooning
The virtio_balloon driver ships with modern Linux kernels. Proxmox uses it to reclaim unused memory from the VM and show accurate utilisation in the UI — no guest-side configuration required.
Related
- Import Disk Image to VM — attach an existing Linux .qcow2 / .img / .raw to a fresh VM.
- Import VM from OVA / OVF — bring in a Linux VM exported from VMware / VirtualBox / Proxmox.
- Add GPU to VM (Passthrough) — for Linux VMs that need GPU acceleration.
- VM and CT Management commands — qm CLI reference.
- Create VM overview.