Import VM from OVA / OVF
Imports an OVA / OVF package into Proxmox VE: extracts OVA archives, parses the OVF descriptor for vCPU / memory / NIC count and disk references, then creates the VM and imports each disk via qm importdisk to the chosen storage. Compatible with exports from VMware (ESXi / Workstation / Fusion), VirtualBox and ProxMenux itself.
What this does
File picker
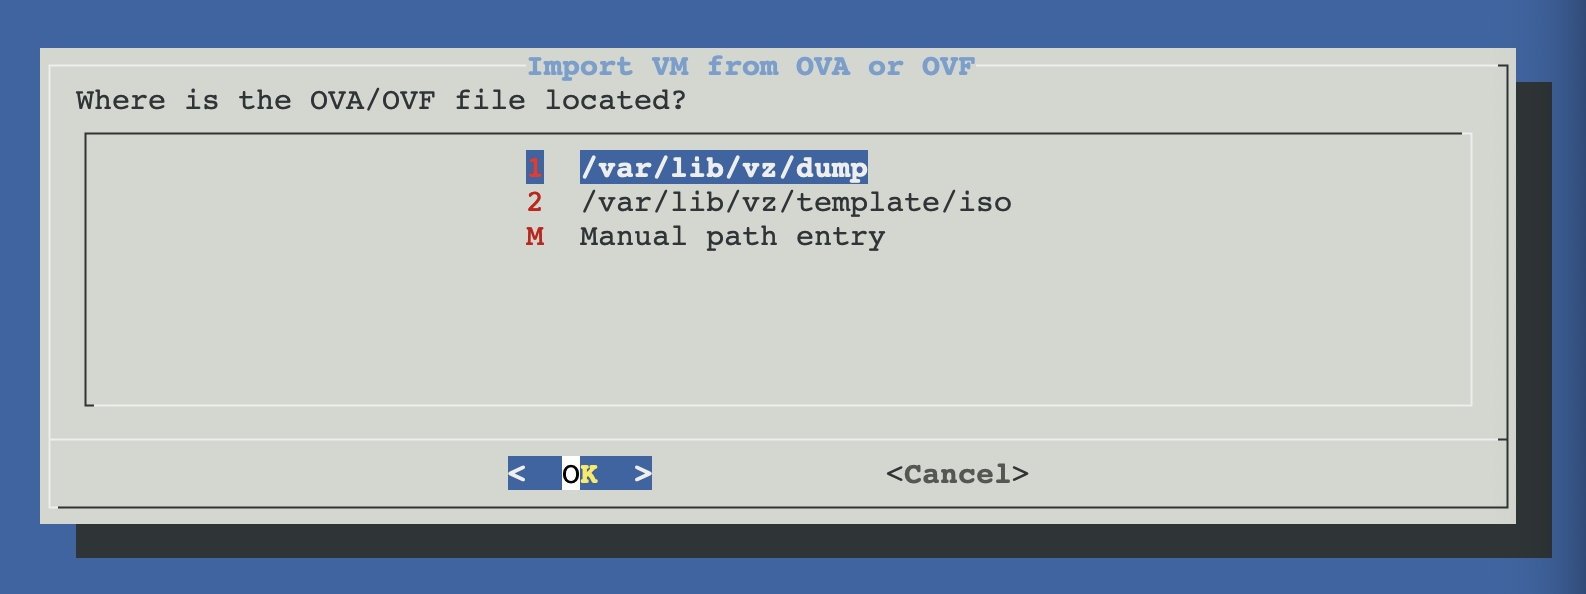
On launch, the script offers two preset directories or a manual path:
/var/lib/vz/dump— the default Proxmox vzdump backup directory./var/lib/vz/template/iso— useful if you sftp'd the OVA there.- Manual path — for OVA / OVF files anywhere else on the host.
It then lists every .ova and .ovf file in the chosen directory.
How the import works
OVF parsing
A gawk parser reads the OVF descriptor and pulls out the VM metadata. The parser uses the 3-argument form of match() which is gawk-specific (mawk — the default awk on Debian / Proxmox — does not support it). On the first import, the script auto-installs gawk via the canonical ensure_repositories + install_single_package pair if it's missing; subsequent imports start instantly. Fields extracted:
| Field | Source in OVF | Default if missing |
|---|---|---|
| VM name | <Name> (first match) | imported-vm |
| vCPU count | RASD ResourceType 3 → VirtualQuantity | 1 |
| Memory (MiB) | RASD ResourceType 4 → VirtualQuantity | 1024 |
| NIC count | count of ResourceType 10 | 1 |
| OS type | /Linux/ or /Windows/ in description | other |
| Disk references | href attributes ending in .vmdk / .qcow2 / .img / .raw | none (import aborts) |
Memory unit ambiguity
qm config $VMID | grep memory against the source VM's documented RAM and adjust with qm set $VMID --memory <MiB> if it's off by a factor of 1024 or 1024².Import dialog flow
- VMID — defaults to the next available (
pvesh get /cluster/nextid). - VM name — defaults to the parsed OVF name; you can override.
- Target storage — menu of all storages with
imagescontent (frompvesm status -content images). - Network bridge — menu of bridges (from
ip link show type bridge); auto-picks if only one exists; defaults tovmbr0. - Confirmation — summary dialog with VMID, name, vCPU, memory, NICs, storage, bridge and the list of disks to be imported. Cancel here = nothing changes.
VM creation
After confirmation, the script runs:
qm create $VMID \
    --name "$NAME" \
    --memory $MEMORY \
    --cores $VCPU \
    --ostype $OSTYPE \
    --scsihw lsi \
    --net0 e1000,bridge=$BRIDGE

# For each additional NIC:
qm set $VMID --netN e1000,bridge=$BRIDGE
SCSI controller defaults to lsi (LSI Logic) for VMDK compatibility. NICs default to e1000 (universal compatibility) on the chosen bridge.
Disk import loop
For each disk reference in the OVF:
qm importdisk $VMID $disk_path $STORAGE— converts the VMDK to the storage-native format (e.g. qcow2 on local-lvm, raw on ZFS) and creates anunusedN:entry in the VM config.- The script greps the config for the just-created
unusedNreference. qm set $VMID --scsiN $unused_disk— attaches the disk asscsi0,scsi1, …qm set $VMID --delete unusedN— clears the now-redundant unused marker.
Boot is set to the first SCSI disk: qm set $VMID --boot c --bootdisk scsi0.
Recommended post-import touch-ups
The import deliberately uses lowest-common-denominator settings to maximise the chance the VM boots first try. Once you confirm it boots, switch to better defaults via the Proxmox UI or CLI:
| Setting | Default after import | Recommended (if guest supports) |
|---|---|---|
| NIC model | e1000 | VirtIO (much faster, needs guest driver) |
| SCSI controller | LSI | VirtIO SCSI single (modern Linux + Windows w/ VirtIO drivers) |
| Firmware (BIOS / UEFI) | Proxmox default (BIOS) | Match the source VM's firmware (mismatched = won't boot) |
| QEMU guest agent | Off | On + install qemu-guest-agent in the guest (better backups, IP reporting) |
| OS type | l26 / win10 / other (heuristic) | Verify against the actual guest OS |
| Display | Default | VirtIO-GPU or SPICE (better console performance) |
Firmware mismatch = no boot
qm set $VMID --bios ovmf for UEFI; default is seabios for BIOS.What is NOT imported
- Specific NIC bridges — only the count. All NICs land on the bridge you picked at import time.
- NIC model — defaults to e1000.
- BIOS / UEFI firmware type — defaults to Proxmox default (BIOS).
- PCI passthrough configuration.
- TPM (vTPM).
- Cloud-init drives.
- Snapshots — only the current state.
- USB / serial / parallel devices declared in the OVF.
- VM tags / notes / start-on-boot options.
Troubleshooting
VM was created but disk import failed — orphan VM left behind
qm destroy $VMID --destroy-unreferenced-disks 1Then fix the underlying cause (likely disk space on the target storage) and re-import.
Imported VM has 8 MB of RAM (or 8 TB)
qm set $VMID --memory 8192 # 8 GiB
Imported VM doesn't boot — "No bootable device"
qm set $VMID --bios ovmf       # UEFI
# also add an EFI disk for the EFI vars:
qm set $VMID --efidisk0 $STORAGE:1,format=qcow2,efitype=4m,pre-enrolled-keys=1
Second-most-common: boot order points at scsi0 but the actual OS disk is scsi1. Edit the boot order in the VM Options tab.
VMware-exported Windows VM imports but BSODs on first boot
lsi (the default) and only switch to VirtIO SCSI after the guest boots and you can install the VirtIO drivers in Windows.OVF parser reports 0 disks
<File ovf:href="...vmdk" ...> entry. If the file extension is unusual (e.g. just .dat), rename it to .vmdk and update the OVF reference, then re-run.awk: syntax error at or near , — parser fails on every OVA / OVF
match()) which mawk — the default awk on Debian / Proxmox — does not support. Recent versions of the script auto-install gawk on first use via the canonical ensure_repositories + install_single_package pair; if you're running an older copy, install it manually:apt-get install -y gawkThen re-run the import.
Network not working after first boot
ip a inside the guest — sometimes the interface comes up with a different name (eth0 vs ens18) and the guest's network config still references the old one.Files involved
scripts/utilities/import_vm_ova_ovf.sh       # this script
/tmp/.proxmenux-import-*/                    # temp extraction dir for OVA
/etc/pve/nodes/<node>/qemu-server/<vmid>.conf  # created by qm create
<storage>/<vmid>/<vmid>-disk-<n>.<fmt>        # disk images, format depends on storage
Related
- Export VM to OVA / OVF — the round-trip partner.
- Utilities overview — back to the section overview.