Create VM
ProxMenux groups VM creation into an interactive dispatcher. Pick the operating system family and the matching wizard handles ISO selection, CPU, RAM, BIOS, network, storage and — optionally — GPU passthrough.
What this menu is for
Opening the menu
From ProxMenux's main menu, select Create VM. You will see this:
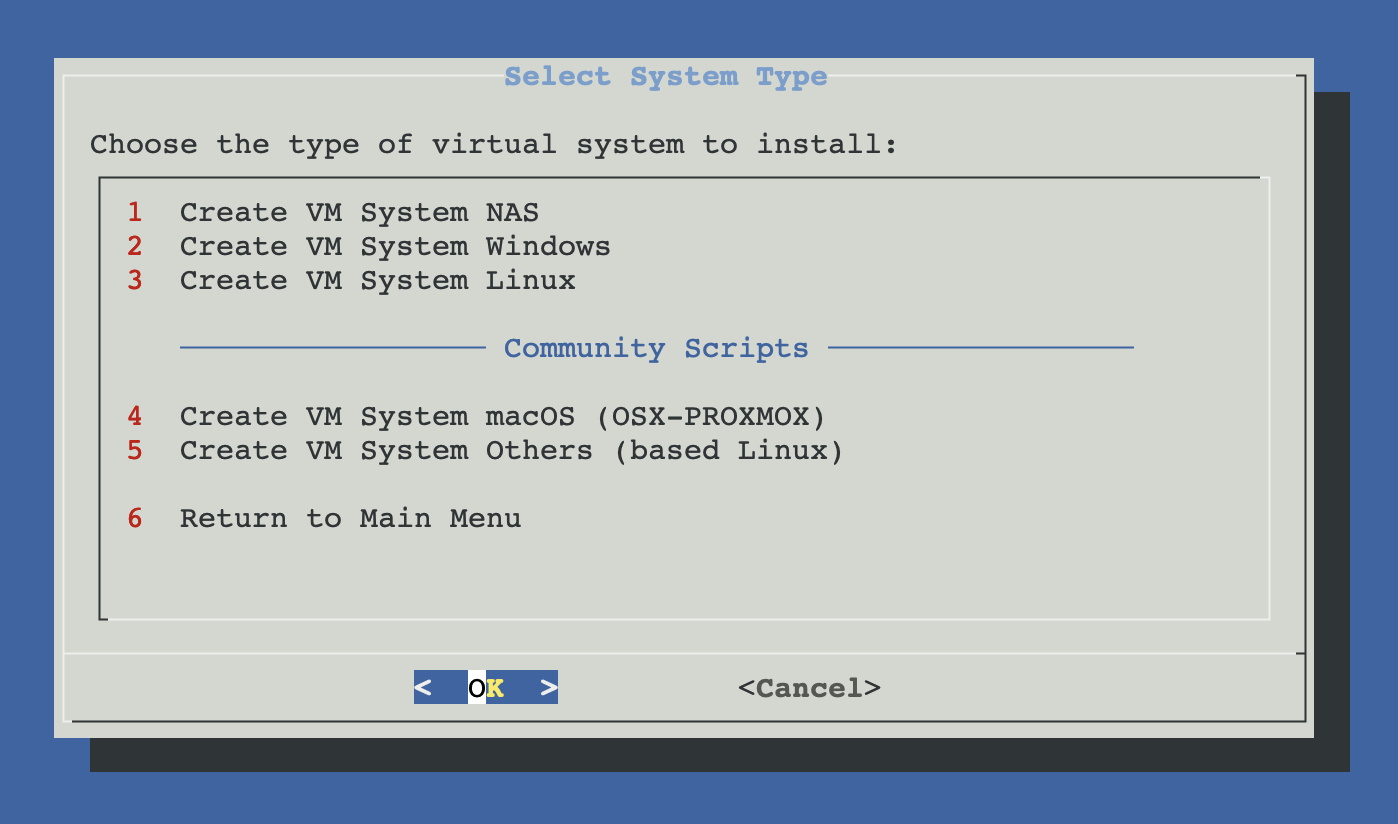
Three OS families
The three ProxMenux entries at the top of the menu share the same underlying engine and post-ISO flow — they just route to different ISO selectors and apply defaults tuned for each family. Pick the one that matches the guest you want to install.
System NAS
Seven NAS operating systems as dedicated VMs. Most use the auto-ISO flow; Synology DSM runs the specialised loader wizard.
- Synology DSM (ARC / RR / TinyCore loaders)
- TrueNAS SCALE and CORE (ZFS)
- OpenMediaVault (Debian-based)
- XigmaNAS (FreeBSD ZFS)
- Rockstor (openSUSE / Btrfs), ZimaOS
System Windows
Windows 10, 11 and Server editions with Windows-friendly defaults (q35 + OVMF + TPM 2.0) and VirtIO drivers pre-mounted.
- UUP Dump for up-to-date ISOs
- Or local ISO from /var/lib/vz/template/iso
- TPM 2.0 added automatically
- VirtIO drivers ISO attached to ide3
- Guest agent channel enabled
System Linux
Curated catalogue of official Linux ISOs auto-downloaded from upstream, plus a local-ISO picker for anything else.
- Ubuntu (Desktop / Server, 20.04–25.10)
- Debian (Desktop / Netinst, 11–13)
- Fedora, Arch, Rocky, Mint, openSUSE
- Alpine, Kali, Manjaro
- Local ISO path for custom images
Community scripts (not documented here)
- System macOS — runs the external OSX-PROXMOX installer. It clones the upstream repository, prepares the host and reboots automatically when finished. Refer to the project's own documentation.
- System Others (Linux-based) — loads a curated list of community Linux-based installers (home-server OSes, router/firewall appliances, etc.). Each community script is maintained outside ProxMenux.
What happens after you pick an OS
Once the ISO is selected, the dispatcher takes the same path regardless of OS family:
- Default vs Advanced. A confirmation dialog lets you accept ProxMenux presets or open the full configurator (CPU model/cores, RAM, BIOS/UEFI, NIC model, machine type).
- Storage plan. You combine one or several virtual disks, imported disks and PCI passthrough devices (whole controller / NVMe) in the same VM.
- Optional GPU passthrough. If a compatible GPU is detected on the host, ProxMenux offers to launch the GPU assistant after the VM is created — a reboot may be required.
- VM creation. The VM is built, tagged, and a styled HTML description is attached to it for quick reference in the Proxmox UI.
Prefer Advanced for VMs you intend to keep
i440fx vs q35) and disk controller (VirtIO SCSI single vs SATA) up front — these are painful to change later.Scripts involved
The dispatcher sources several shared component scripts not documented as individual pages. They are listed here for reference. Each sub-page links to the main script relevant to its flow.
| Script | Role |
|---|---|
| menus/create_vm_menu.sh | Entry point dispatcher. |
| vm/select_nas_iso.sh | ISO / appliance selector for NAS systems (Synology, TrueNAS, OMV, Rockstor, ZimaOS). |
| vm/select_windows_iso.sh | Windows ISO selector. Delegates to the UUP Dump builder when needed. |
| vm/select_linux_iso.sh | Linux ISO selector for the Linux flow (mainstream distributions). |
| vm/synology.sh | Synology DSM flow: fetches loader and DSM image and prepares the VM profile. |
| vm/zimaos.sh | ZimaOS flow: downloads the image and wires it into the VM definition. |
| vm/vm_configurator.sh | Default vs Advanced wizard: CPU model/cores, RAM, BIOS, NIC, machine type. |
| vm/disk_selector.sh | Storage plan: virtual disk, disk import, or Controller/NVMe passthrough. |
| vm/vm_creator.sh | Final VM creation: applies the config, attaches storage, writes the HTML description. |
| vm/guest_agent_config.sh | Optional QEMU guest agent setup hook, used by several flows. |
Related
- Disk Manager — attach existing physical disks or import disk images into VMs.
- UUP Dump ISO Creator — generate Windows install ISOs ready to use as boot media.
- Import VM from OVA / OVF — bring in pre-built VMs from VMware / VirtualBox / ProxMenux exports.
- Add GPU to VM (Passthrough) — pass a GPU into a freshly-created VM.
- VM and CT Management commands — qm reference for the CLI side.