Create VM: System Windows
Create a Windows VM on Proxmox VE. ProxMenux handles ISO selection (UUP Dump or local), CPU / RAM / machine-type configuration, the unified storage plan, optional GPU passthrough, TPM 2.0 setup and VirtIO driver install.
What this script does
/var/lib/vz/template/iso) and then runs the shared VM wizard. It applies Windows-friendly defaults — q35 + OVMF + TPM 2.0 — attaches the VirtIO drivers ISO to a second CD-ROM slot, and leaves you with a VM ready to boot the Windows installer.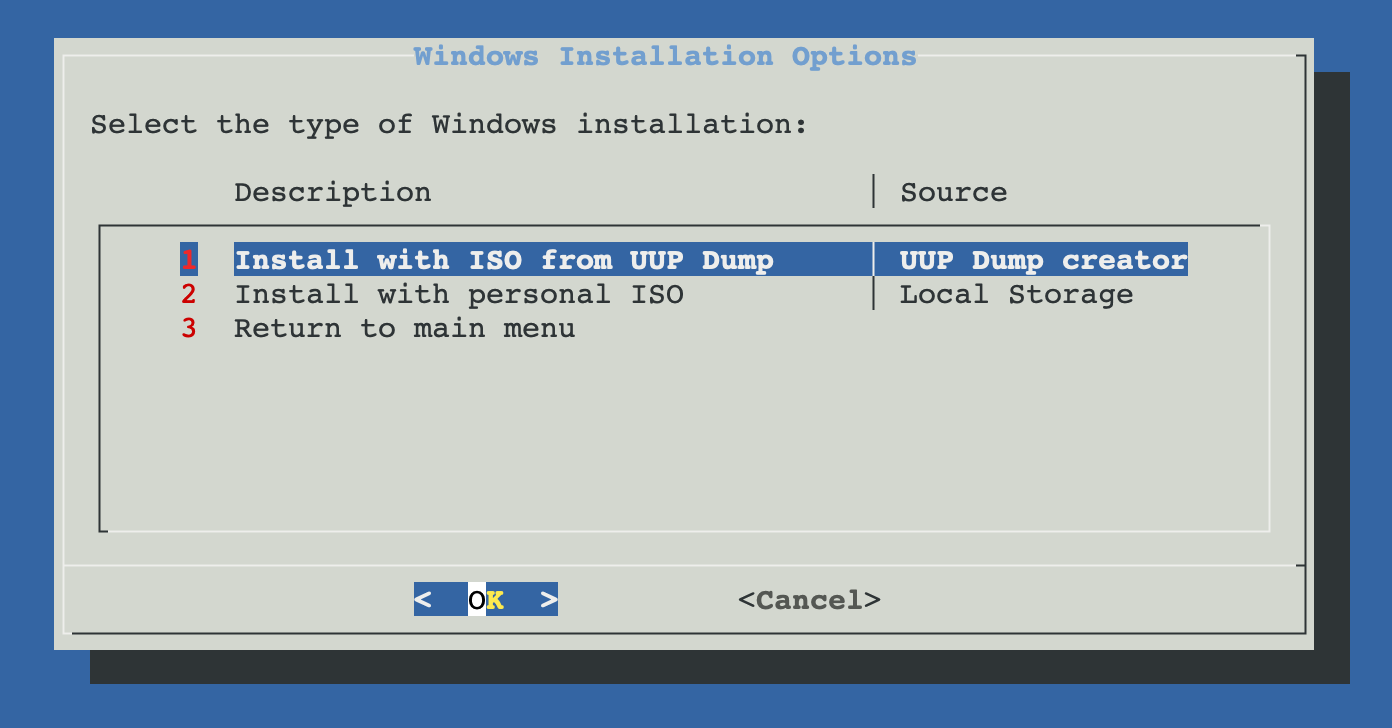
Default vs Advanced configuration
After the ISO is selected, ProxMenux asks whether to use the default VM profile or open the advanced wizard. The default profile is tuned for modern Windows desktop and server editions.
Default configuration
| Parameter | Default value |
|---|---|
| Machine type | q35 |
| BIOS | OVMF (UEFI) |
| CPU type | Host |
| Cores | 4 |
| RAM | 8192 MB |
| Bridge | vmbr0 |
| MAC address | Auto-generated |
| TPM | Enabled (v2.0) |
| Start on completion | No |
Advanced configuration
The advanced wizard exposes every knob individually:
| Parameter | Options |
|---|---|
| Machine type | q35 or i440fx |
| BIOS | OVMF (UEFI) or SeaBIOS (Legacy) |
| CPU type | Host or KVM64 |
| Cores | Number of CPU cores |
| RAM | Memory allocated to the VM |
| Bridge | Network bridge |
| MAC address | Custom MAC |
| VLAN | VLAN tag (optional) |
| MTU | MTU size |
| TPM | Enable or disable TPM 2.0 |
Windows 11 and Windows Server 2022 need TPM
Storage plan
After CPU / RAM, ProxMenux opens the Storage Plan menu, where you can combine virtual disks, imported disks and PCI passthrough devices in the same VM, adding items one at a time and finishing when you are done.
a. Add virtual disk
- Lists the Proxmox storage volumes available on the host.
- You pick the target storage and the size in GB.
- The disk is attached to the VM as SATA (
sata0,sata1, … up to 6).
b. Add import disk
- Detects physical disks that are safe to import (system and protected disks are hidden).
- You select one or more disks via a checklist.
- Imported disks are attached as SATA via
qm set.
c. Add Controller or NVMe (PCI passthrough)
- Detects SATA/SAS HBAs and NVMe devices on the host and lets you pass an entire controller into the VM. IOMMU must be enabled; the script offers to enable it and reboots if required.
- A confirmation step warns about controller-wide risk (the whole card, including every disk on it, leaves the host).
- The selected PCI devices are attached via
qm set hostpciN: ….
Reset and finish
Optional GPU passthrough
After the storage plan, if a compatible GPU is detected on the host ProxMenux offers to launch the GPU passthrough assistant. See Add GPU to a VM (Passthrough) for how the assistant works — a host reboot may be required.
Automatic VM features
EFI disk
When OVMF (UEFI) is selected, ProxMenux creates a 4 MB EFI system disk on the storage you pick and attaches it to the VM so the UEFI firmware has a place to store its variables.
TPM 2.0
A virtual TPM 2.0 device is added automatically so Windows 11 / Server 2022 installers pass the hardware compatibility check.
ISO mounting
The installation ISO is attached to ide2. The VirtIO drivers ISO is downloaded (if needed) and attached to ide3, ready for the Load driver step.
QEMU Guest Agent
The guest agent channel is enabled in the VM config. The agent itself is installed inside Windows by running virtio-win-guest-tools.exe after setup.
Windows installation options
ProxMenux offers two methods to obtain the Windows installation media:
UUP Dump ISO Creator
The UUP Dump ISO Creator script is a ProxMenux utility that builds a Windows ISO on the fly from Microsoft's Windows Update servers. It pulls clean, official installation files (including Insider Preview builds).
- Access to the latest Windows builds.
- Supports Insider Preview versions.
- Clean, official Microsoft installation files.
- Automatic ISO creation and mounting in the VM.
- Supports Home, Pro and Enterprise editions.
Install with local ISO
Uses a Windows ISO you have already uploaded to the host's local storage (/var/lib/vz/template/iso). The script lists every non-VirtIO ISO it finds and lets you pick one.
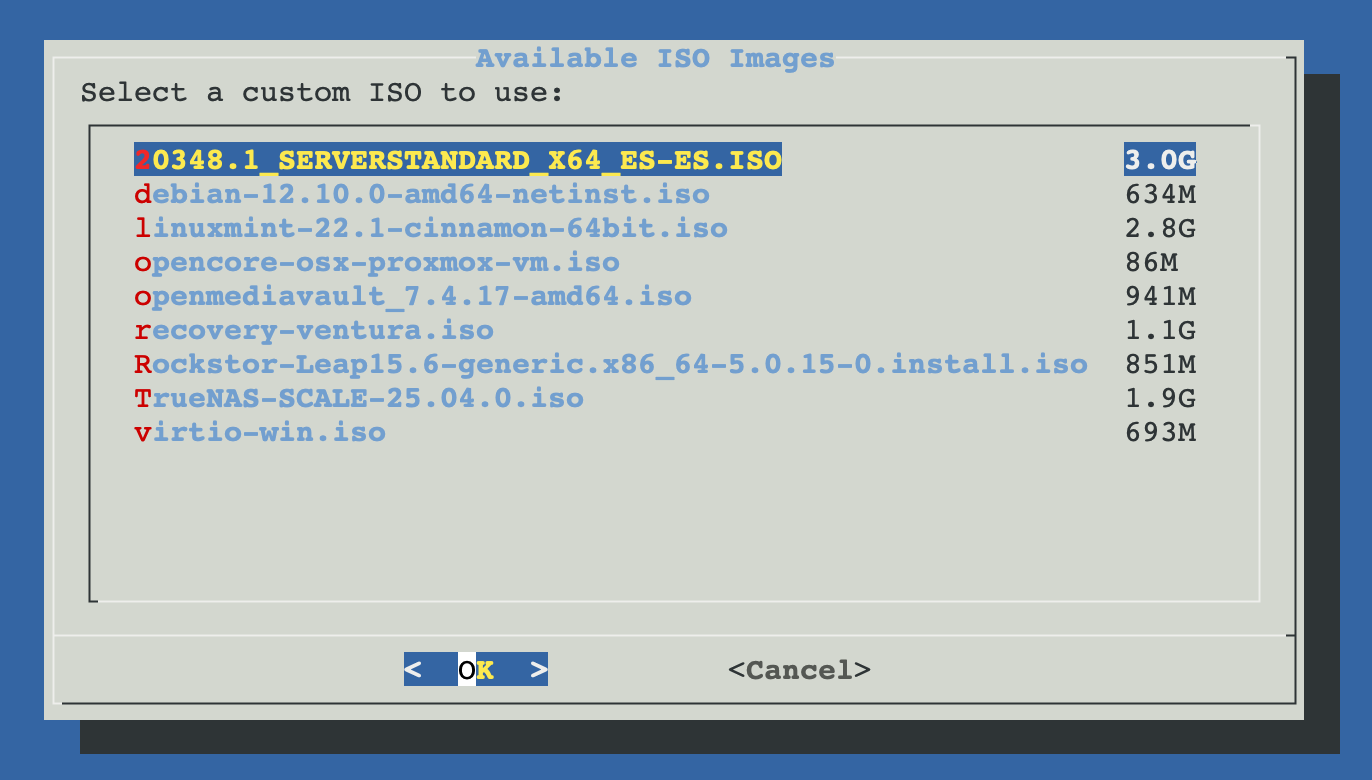
Local ISO selection menu
What the script does end-to-end
- Obtains the Windows ISO (UUP Dump build or local copy).
- Applies the default or advanced CPU / RAM / BIOS / machine-type configuration.
- Opens the storage plan and attaches the selected virtual disks, imported disks and PCI devices.
- Creates the EFI disk (UEFI installs) and attaches the TPM 2.0 device.
- Mounts the Windows ISO on
ide2. - Downloads and mounts the VirtIO drivers ISO on
ide3. - Sets the boot order (disk first, then ISO).
- Enables the QEMU Guest Agent channel.
- Optionally runs the GPU passthrough assistant.
- Generates a styled HTML description attached to the VM.
- Starts the VM if you chose to.
VirtIO drivers during installation
If you leave storage and networking at defaults (SATA + e1000), Windows will install without extra steps. However, the Proxmox storage plan always attaches virtual disks as SATA, which works out of the box. Where VirtIO becomes relevant is if, during the Advanced wizard, you pick VirtIO or SCSI for disks or VirtIO for the NIC — in that case Windows will not see those devices until the matching driver is loaded from the VirtIO ISO mounted at ide3.
Without the VirtIO network driver there is no internet during install
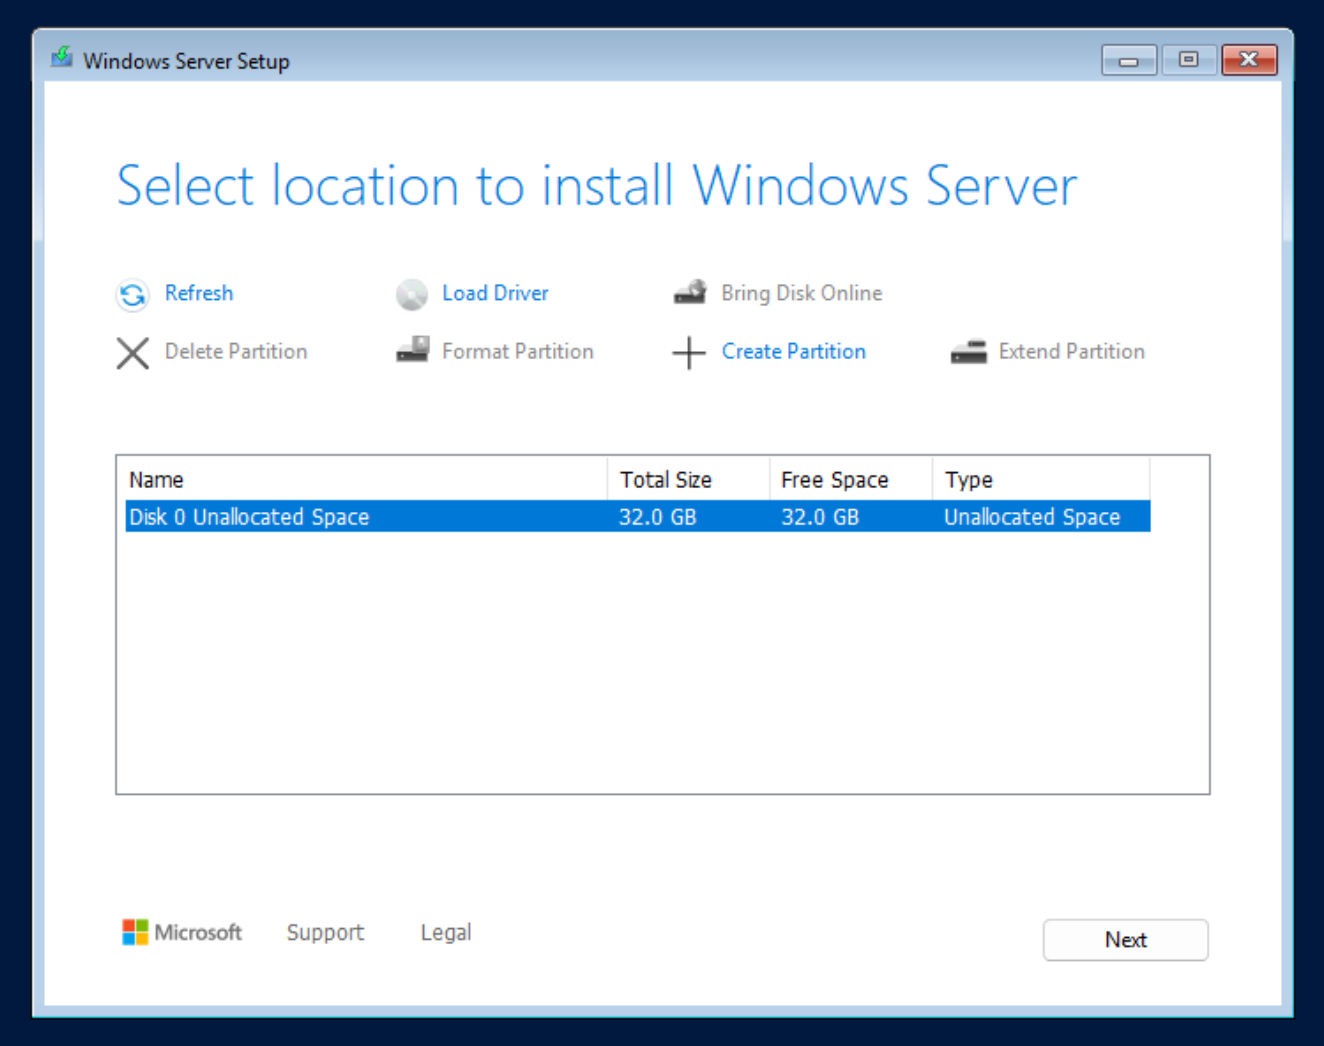
virtio) as the network interface and do not load the driver during setup, Windows will not have internet access. That can block activation and Windows Update steps during first boot.Access the "Where do you want to install Windows?" screen
During Windows setup, if no disks are shown, the storage driver for your selected interface (SCSI or VirtIO) is not loaded yet. Load it manually from the mounted VirtIO ISO.

Click "Load driver"
Click Load driver to browse the mounted VirtIO ISO and pick the storage driver that matches the interface you chose.
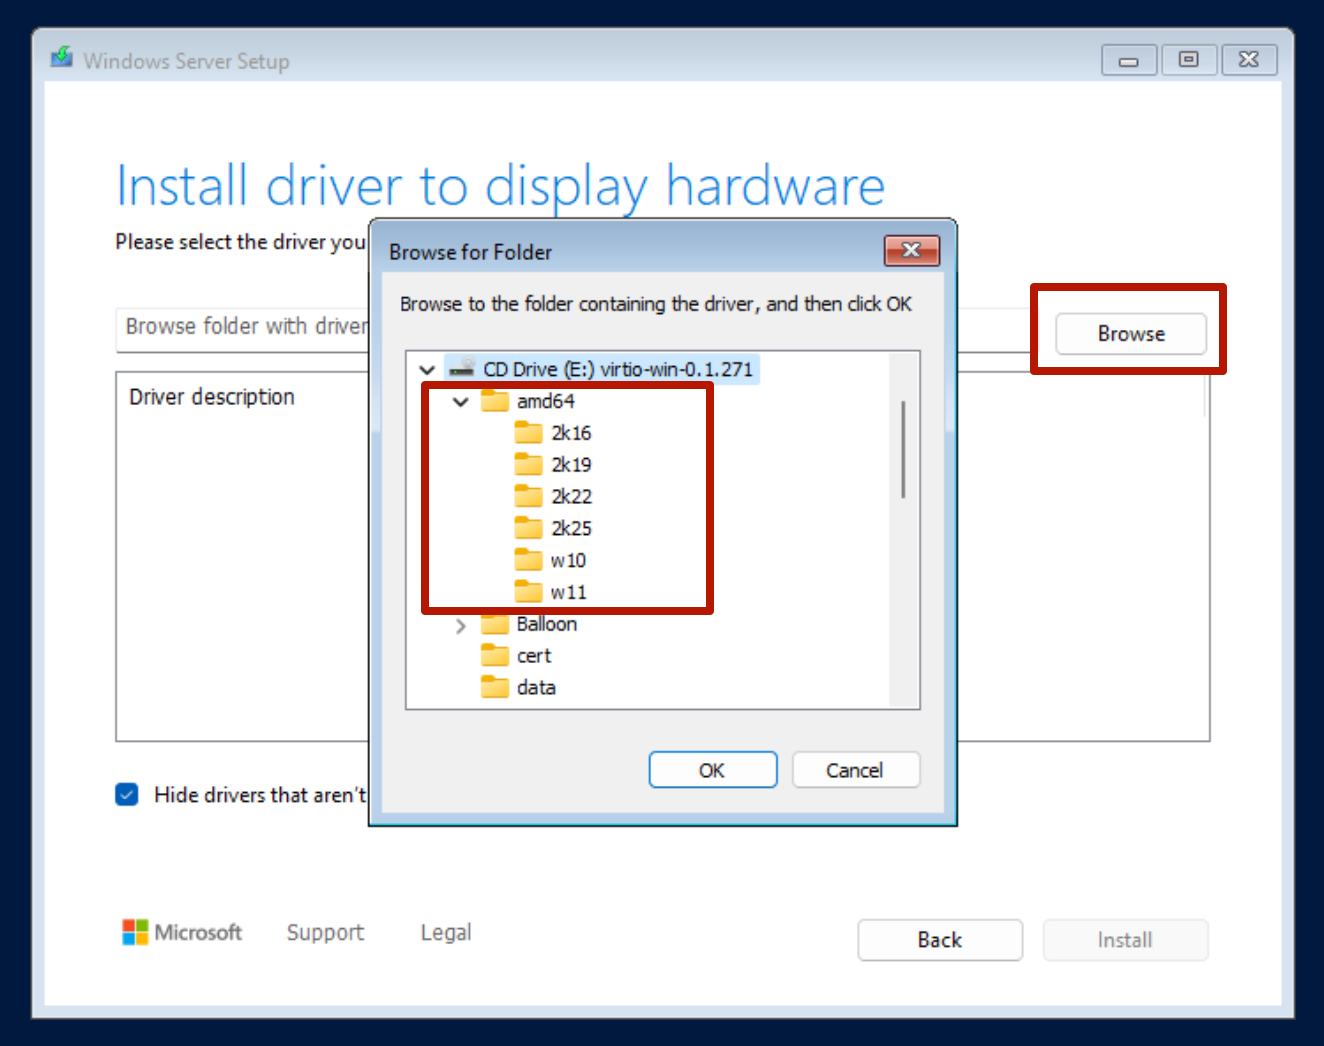
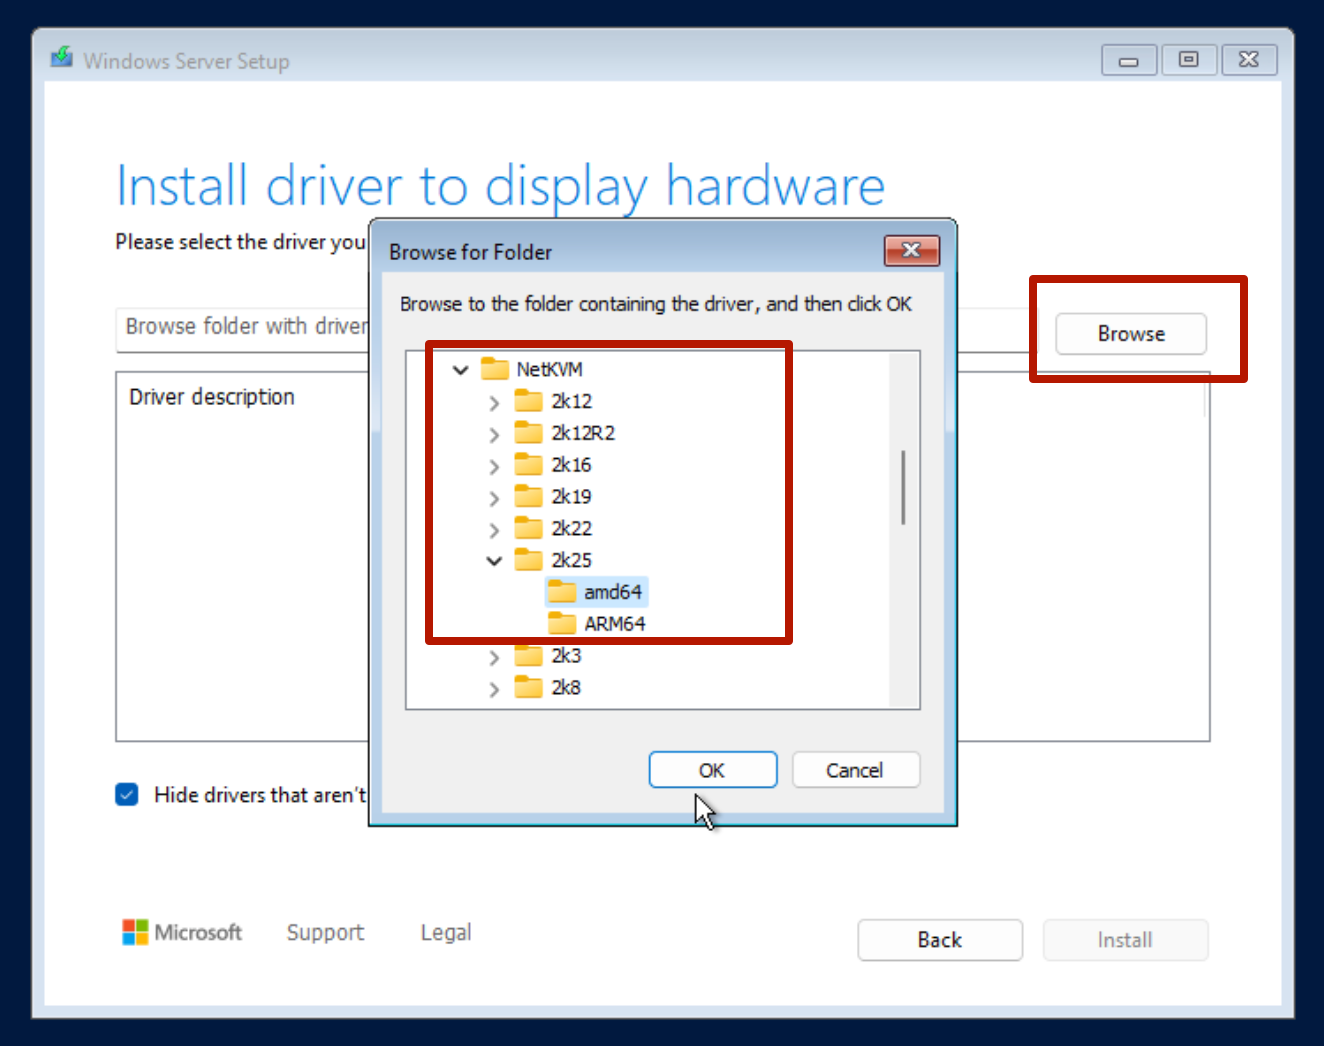
Browse to the correct driver folder
On the VirtIO ISO navigate to the folder that matches the interface and Windows version — for example viostor for VirtIO SCSI, with subfolders per Windows edition (10 / 11 / Server).
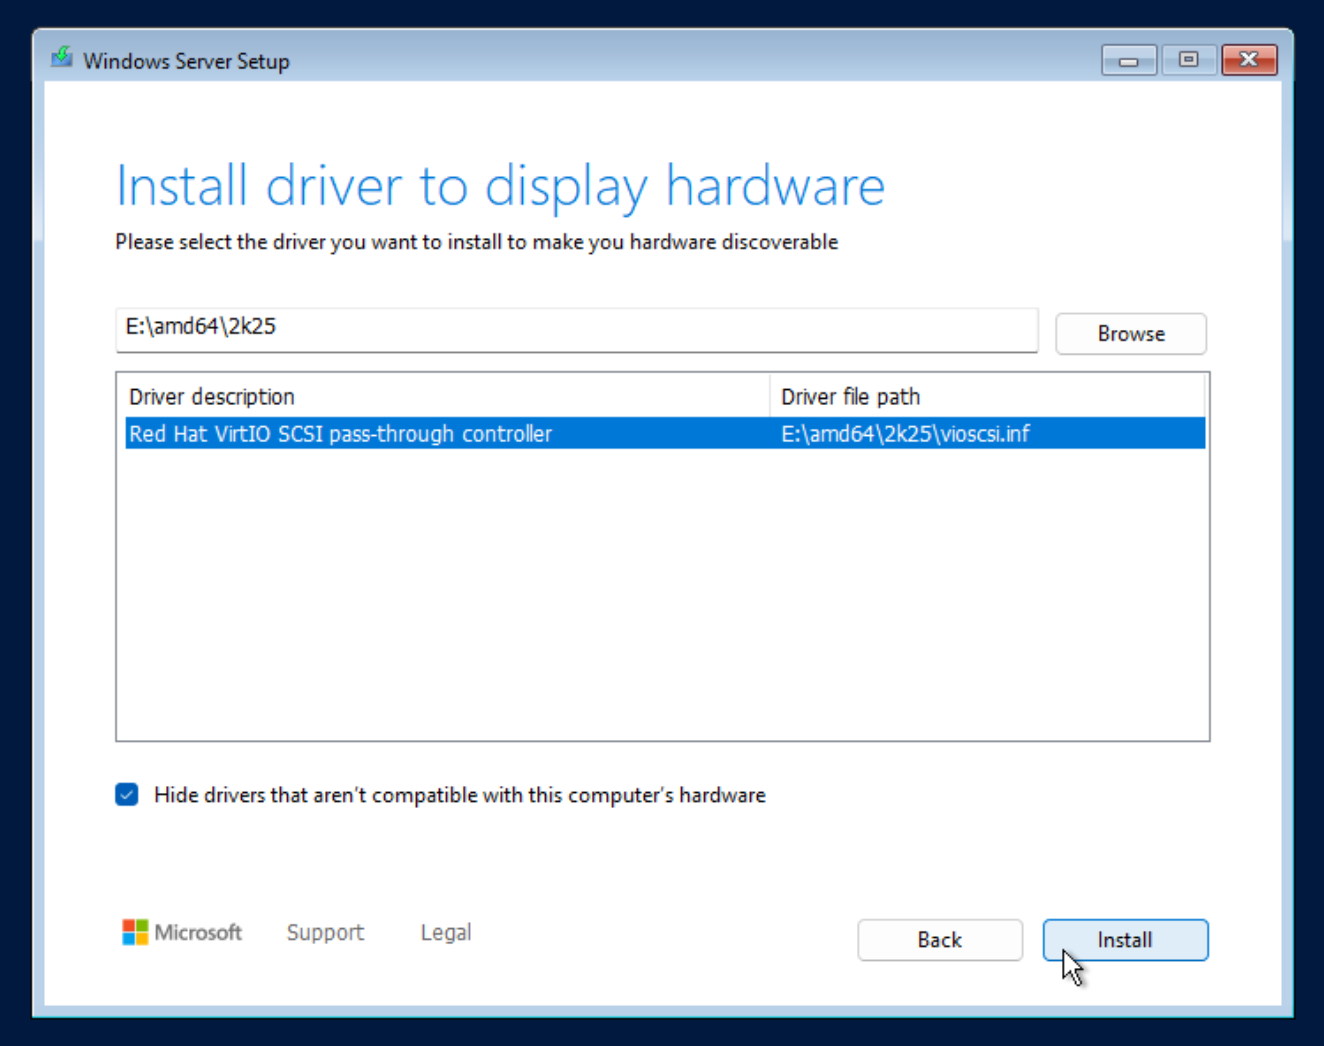
Select the driver
Windows lists the available drivers. Pick the one that matches your setup (typically Red Hat VirtIO SCSI controller) and click Next.
(Optional) Install the network driver
If you also picked VirtIO as the network interface, load the network driver from the NetKVM folder of the same ISO, selecting the subfolder for your Windows version. Without this step Windows installs without internet access.
Post-install: run virtio-win-guest-tools.exe
virtio-win-guest-tools.exe. It installs the remaining drivers (network, display, input, ballooning, QEMU Guest Agent) in one shot.Related
- UUP Dump ISO Creator — generate up-to-date Windows installation ISOs on the Proxmox host.
- Import Disk Image to VM — attach an existing Windows .vhdx / .vmdk to a fresh VM.
- Add GPU to VM (Passthrough) — for Windows VMs with hardware-accelerated GPU.
- VM and CT Management commands — qm CLI reference.
- Create VM overview.