Export VM to OVA / OVF
Converts a Proxmox VM to a portable OVA (single TAR archive) or OVF (descriptor + VMDK files) package using the standard DMTF OVF schema. Disks are converted with qemu-img to streamOptimized VMDK. The result is importable on VMware (ESXi / Workstation / Fusion), VirtualBox and back into Proxmox via the import tool.
What this does
.ova file or an -ovf directory. The source VM is never modified.VM picker
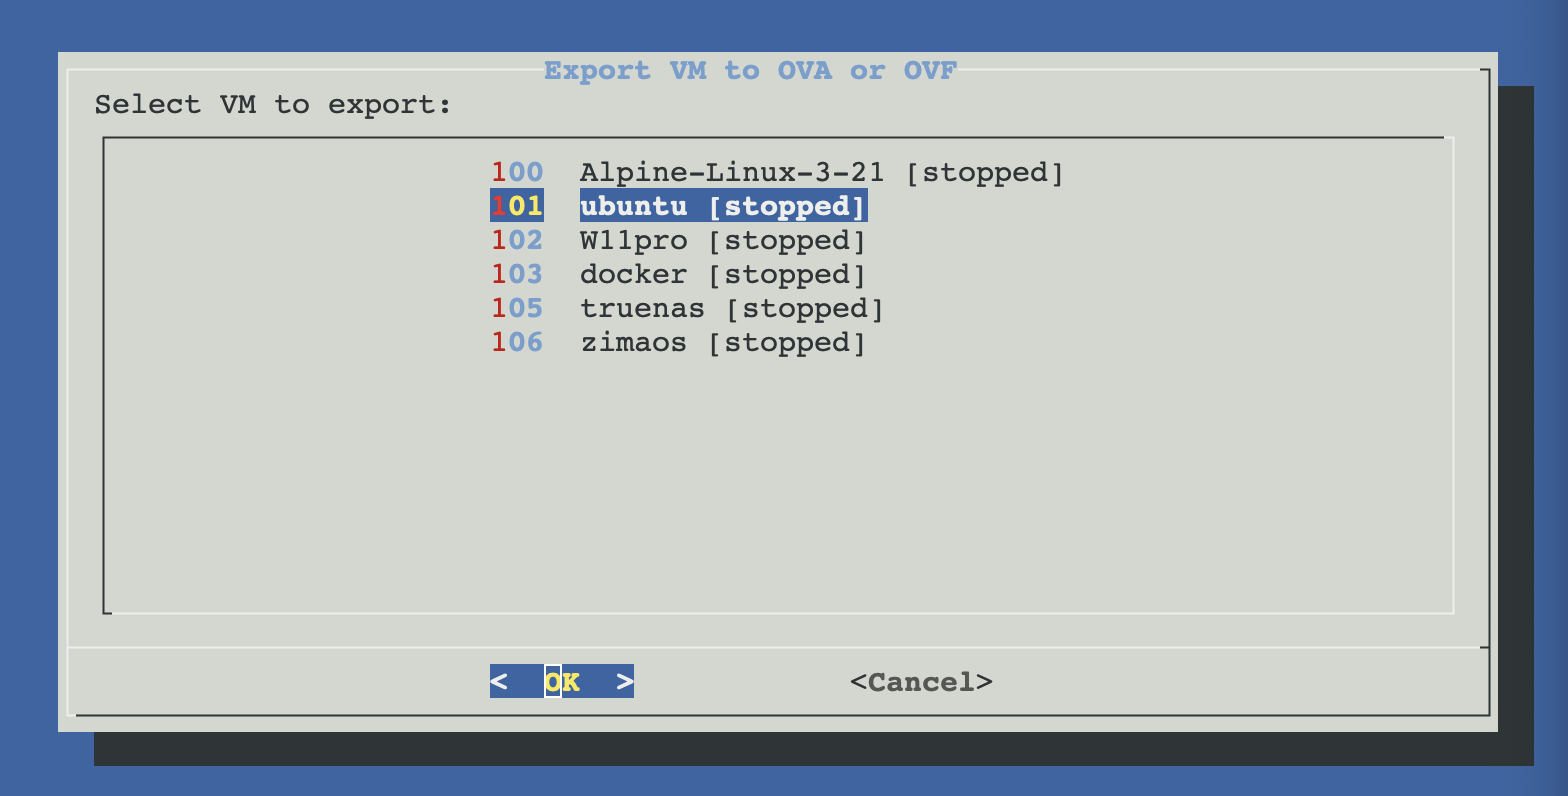
On launch, the script lists every VM from qm list with VMID, name and status. Pick the one to export:
VM must be stopped
A consistent disk image requires a stopped VM. If the selected VM is running, ProxMenux offers to stop it:
- Graceful shutdown via
qm shutdown $VMID --timeout 120(waits 2 min for guest ACPI shutdown). - If timeout, offers force stop:
qm stop $VMID(equivalent to power-off). - If you decline both, the export is aborted — no data is touched.
Force-stop is power-off
qm stop is equivalent to yanking the power. The guest may need filesystem repair on its next boot. Prefer the graceful shutdown when possible; reserve force stop for unresponsive guests.Format selector: OVA vs OVF
| Format | Output | Pros | Cons |
|---|---|---|---|
| OVA | name-vmid-ts.ova | Single file — easy to move, sftp, attach to a ticket. Self-contained. | Needs ~220% of virtual disk size (TAR overhead during creation). |
| OVF | name-vmid-ts-ovf/ | ~120% disk overhead. Easier to inspect (descriptor is plain XML). Can edit before importing. | Multiple files — must transfer all of them together. |
Destination directory
Pick from presets (/var/lib/vz/dump, /var/lib/vz/template/iso) or enter a manual path. The script validates the directory is writeable and warns if free space looks tight before starting.
Free space rule of thumb
What ends up in the package
For an OVA / OVF named myvm-100-2026-04-26_18-30-15:
# OVA mode (single .ova file is a TAR of):
myvm-100-2026-04-26_18-30-15.ovf      # XML descriptor (DMTF OVF 1.0 + RASD + VSSD)
myvm-100-2026-04-26_18-30-15.mf       # SHA1 manifest
myvm-100-2026-04-26_18-30-15-disk0.vmdk
myvm-100-2026-04-26_18-30-15-disk1.vmdk
...

# OVF mode (a directory):
myvm-100-2026-04-26_18-30-15-ovf/
├── myvm-100-2026-04-26_18-30-15.ovf
├── myvm-100-2026-04-26_18-30-15.mf
├── myvm-100-2026-04-26_18-30-15-disk0.vmdk
└── myvm-100-2026-04-26_18-30-15-disk1.vmdk
What gets exported
- Disks: all
scsi*,sata*,virtio*,ide*entries in the VM config, converted to streamOptimized VMDK. - vCPU count (RASD ResourceType 3) and memory in MiB (ResourceType 4).
- Number of NICs (ResourceType 10 — count only, not the bridge or model).
- VM name and a hint of OS type.
What is NOT exported
- CD-ROM / ISO mounts (excluded by design).
- Cloud-init drives (excluded by design).
- Specific NIC bridge / model (only the count is preserved).
- BIOS / UEFI choice — must be reset on import.
- PCI passthrough configuration.
- Snapshots — only the current state is captured.
- VM-level options (NUMA, hugepages, hotplug, …).
Disk conversion
Each disk is converted with:
qemu-img convert -p -O vmdk -o subformat=streamOptimized \
    "$source_path" \
    "$work_dir/<base_name>-disk<N>.vmdk"
streamOptimized is VMware's single-pass readable format — supported by ESXi 6.7+, VMware Workstation, VirtualBox and obviously Proxmox itself. It's the most widely-compatible VMDK subformat and the right choice for portability. Trade-off: it's not randomly seekable, so you can't mount it directly without conversion.
SHA1 manifest
Every package includes a .mf file with SHA1 hashes of the OVF descriptor and each VMDK:
SHA1(myvm-100-2026-04-26_18-30-15.ovf)= 3a7bd3e2360a3d29eea436fcfb7e44c735d117c9
SHA1(myvm-100-2026-04-26_18-30-15-disk0.vmdk)= b7e23ec29af22b0b4e41da31e868d57226121c84
SHA1(myvm-100-2026-04-26_18-30-15-disk1.vmdk)= a87ff679a2f3e71d9181a67b7542122c
Optional in the OVF spec — many readers ignore it — but useful for verifying the package made it across intact. Verify manually with sha1sum -c file.mf.
Importing the result
The exported package is consumable by:
- Proxmox — use the matching Import VM from OVA / OVF tool.
- VMware ESXi — Datacenter → Deploy OVF Template, point at the .ova or .ovf.
- VMware Workstation / Fusion — File → Open, choose the .ova or .ovf.
- VirtualBox — File → Import Appliance, choose the .ova or .ovf.
Troubleshooting
qemu-img convert fails halfway with "No space left on device"
Export completes but VMware refuses to import: "Unsupported hardware family"
<vssd:VirtualSystemType> and edit it to a value ESXi accepts (e.g. vmx-13 for ESXi 6.5+). For a quick workaround, try VirtualBox — it's more permissive.Imported VM in VMware has e1000 NIC but I want VirtIO
VirtIO SCSI if your guest supports it).VM was running and I declined to stop it — export aborted
qm shutdown $VMID) and re-run.Disk conversion is slow
qemu-img convert is single-threaded and reads the source at full speed. For a 100 GB disk on spinning rust, expect 15-30 minutes. NVMe to NVMe is 5-10x faster. Multi-disk VMs convert sequentially — time scales linearly with total virtual size.Related
- Import VM from OVA / OVF — the round-trip partner.
- Utilities overview — back to the section overview.